
.JPG) Firstly, I ordered a pair of Hitec HS-81 micro servos which truly are micro at a whopping 1.2"x0.47"x1.2". Naturally I had to pry them open and have a look around the insides. The idea is to convert them to continuous motion so they can eventually drive some gears. Here were the obstacles in doing that:
Firstly, I ordered a pair of Hitec HS-81 micro servos which truly are micro at a whopping 1.2"x0.47"x1.2". Naturally I had to pry them open and have a look around the insides. The idea is to convert them to continuous motion so they can eventually drive some gears. Here were the obstacles in doing that: Little plastic mechanical stop in the gear case.
 No Problem.
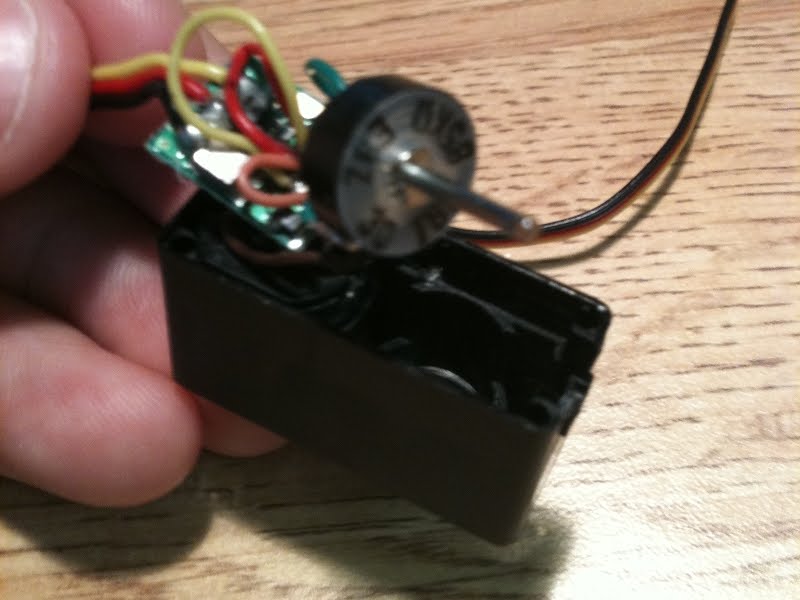 Potentiometer.
 Tricked the servo with a couple resistors, no sweat.*
 *Except I chipped a tooth.
Now, because these servos are so small the shaft of the potentiometer is actually used to align some of the gears and I couldn't just get rid of the pot altogether. Instead I filled it with hot glue so that it couldn't rotate (not sure why since I cut the wires from it), put it back in place, and reconnected it to the gears. Unfortunately, the end of the shaft is keyed to fit into the spline gear. I cut out the excess material in the gear to assure that the shaft could rotate freely, but at this small scale that is not easy and when I went to test it the gear still caught on the pot, locked up, and broke a tooth.
Lesson learned: drill out the gear the right way, not with a pocket knife. Also I'm going to order these servos' big brother the Hitec HS-82MG, for the final product which features metal gears for about $4 more.
With one servo left I could still test out the XBee radios. The basic concept of this project is to control an Arduino with an iPhone over wifi, and then over radio with XBees. In the previous post I determined I could make it from A to B, so now it was time to test from B to C. To do this I got a breakout board and an explorer board and crammed them onto a breadboard like so:
 Nothing too tricky here other than a voltage divider circuit with a few resistors to bring down the Arduino's 5V output to the 3.3V that the XBee module runs on (Thanks Shane!). It's also important to note that thou shalt remove the radio while programming. I don't exactly know why this is yet, but it's going to throw an uploading error at you if you don't.
It works! In fact, I also got A to B to C working, but couldn't record it since I use my iPhone camera for video. Maybe I could have figured something out...with mirrors? For now you'll have to take my word that it works. It was actually surprising how easy these radios are to implement. You have to make sure the baud rate of the Arduino is the same as the XBees, but that's the only change I made to the existing test code. Next step is to refine this crazy control sequence and start speed control testing, hopefully with some working continuous motion servos.